The Workbench allows for the creation of two or more sets of editors in the editor area. The editor area can also be resized but views cannot be dragged into the editor area.
Open at least two editors in the editor area by double-clicking editable files in one of the navigation views.
Click and drag one of the editor's tabs out of the editor area. Do not release the mouse button.
Notice that the restricted cursor displays if an attempt is made to drop the editor either on top of any view or outside the Workbench window.
Still holding down the mouse button, drag the editor over the editor area and move the cursor along all four edges as well as in the middle of the editor area, on top of another open editor. Notice that along the edges of the editor area the directional arrow drop cursors appear, and in the middle of the editor area the stack drop cursor appears.
Dock the editor on a directional arrow drop cursor so that two editors appear in the editor area.
Notice that each editor can also be resized as well as the entire editor area to accommodate the editors and views as necessary.
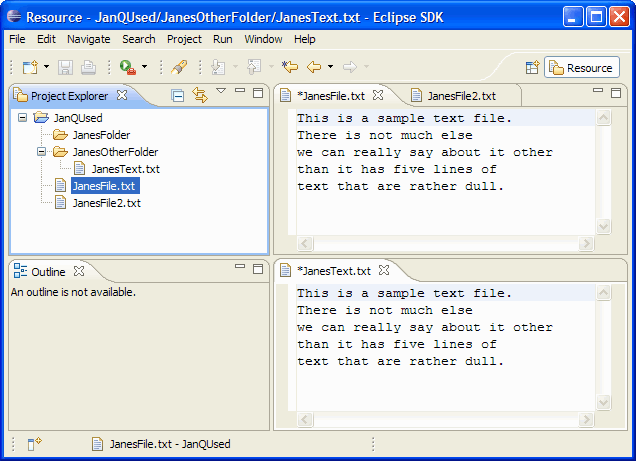
It is important to observe the color of an editor tab (in the figure below there are two groups, one above the other)
blue - indicates that the editor is currently active
default (gray on Windows XP) - indicates that the editor was the last active editor. If there is an active view, it will be the editor that the active view is currently working with. This is important when working with views like the Outline and Properties that work closely with the editor.
Drag and dock the editor somewhere else in the editor area, noting the behavior that results from docking on each kind of drop cursor. Continue to experiment with docking and resizing editors and views until the Workbench has been arranged to satisfaction. The figure below illustrates the layout if one editor is dragged and dropped below another.